


Tips For Blog Photos
What makes a blog stand out for you? For me, pictures are the first thing that grab my attention and make me hit the “follow button”. Writing gives me a headache, but taking photos ― THAT is the most rewarding part of blogging for me. Every picture you see here was planed even before they were shot, and they all went through some tweaking. They may look simple but a lot of effort was needed to capture them.
Before anything else, a quick disclaimer ― I’m not an expert at photography. I’m just another blogger like you who spends waay too much time with my pictures, and here are some tricks I’ve learned so far. I feel like most of you may already know all these, which almost made me bury this entry in the drafts folder. Then I thought if at least one of you gets something out of it then this post serves it’s purpose :)

do you need a good camera to take good photos?
This was something we debated on back in a photography seminar I attended. You don’t need to feel pressured to buy an expensive DSLR to take good photos. An old digi-cam can do that for you too. Although it’s true there’s a difference in quality between the two. So if you have the budget for it, a better camera, plus a tripod, remote, lights… A STUDIO (just kidding!) are always worth investing in. These can kick your photos’ quality up a notch.
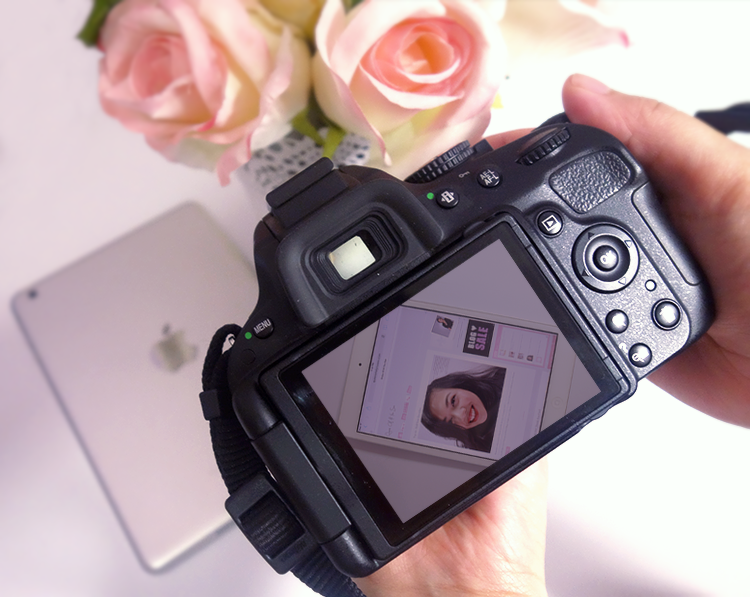
P.S. to those who asked, I use a Nikon D5100 :) (and sometimes a SONY RX100)
If not, whatever camera you have now can still create a good image. Back when I had a shop, I used a 7-megapixel digi-cam (so old school lol) and it took pictures that were good enough to be published in a magazine next to another shop photo taken by an actual DSLR.
The key is to study your own camera. If your lens thinks it’s too dark indoors, transfer to a place where it can catch more light. Also be patient, it took me forever and a half to get used to my DSLR’s basic settings. Watch YouTube tutorials, attend seminars, and ALWAYS take backup shots in case your first clicks captured a crappy shot (I’m paranoid so I usually have hundreds of these).


composition and design
As much as I like pictures of YSL lipsticks on a clean white background. I still prefer pictures taken over a blogger’s makeup dresser, with her cosmetic thingamajigs peeking from the background. Why use a picture your readers can see a dupe of at YSL.com? Personalized photos are the strength of blogs over perfectly polished stock images because they are more relatable.
You can turn your favorite tweed jacket, books, or pillows into backdrops. And add your fancy room decors (flower pots on your white board), or even your dog in the picture for more depth and cuteness factor. Just make sure it’s easy on the eyes and your subject is STILL the star of the picture.
Practice will help you find your own photography style. This can be seen through the ― brightness, composition, shadows, framing, ambiance… of a picture. If you’re not sure of your photography style yet ― find inspiration. Pin photos from your favorite blogs and shopping sites, then write down the elements that make you stare at each photo. I mostly get my inspiration from GOOP, Martha Stewart, random Pinterest boards, and other fellow bloggers like Vanessa, Quinn, Andrea.


technical details
This is the part where photography tools are a big help. Not having them though, can always be replaced with a little resourcefulness. For example, Studio lights can always be replaced by sunlight (best light source). Or in my case ― the bedroom ceiling light, lamps, and in times of desperation… my laptop’s screen. You may think it’s too much, but inside a bedroom that’s like the bat cave, an army of lights is needed.
Experiment with different points of view. It helps make a review post less boring to look at. When I’m up for it I shoot standing up (from above of the subject), and from other different angles. Play with the Depth of Field ― this is the area in your image that appears sharper compared to the other “blurred” parts. If you focus your camera to a subject it creates a 3D illusion, which makes it more interesting compared to a flat picture. The rule of the thirds is a useful guideline in finding the best ways to frame your photos.The lines as shown above should help you balance out how you will position things (and text labels) inside the photo position your products.
I hope this was helpful. I might write “how I edit my blog photos” too so I skipped some photo tips for that post :)
113 Comments
Oh wow thank you so much for sharing your tips on photography!
I agree most of the times i follow people when they have really nice pictures on their blog haha! I love the flowers that you use for decoration, they're so pretty, i never know where to buy those from!
xx
http://www.beautifyinglifee.blogspot.com
Nice post! You have a beautiful lay- out as well! xx
Such a great collection if tips and tricks! So many good ones!
I actually can relate with this!
I used to be really sloppy with my photos but nowadays I try to take the best I can. And I'm still not 100% happy. I'm currently revamping an old drawer container and I'm already thinking about decoration that might be good as propos too. I'm also looking for a nice LED lamp because the window of my current room is really small so the lighting isn't like I want – and for a digital camera, lighting is everything.
Nowadays I even use my grandmother's old tea plates for my photos. It's a cliché, but it's something extra (I'm on the hunt for the perfect fake flowers. I want to get pink roses and white orchids for two flower containers..)
Thank you for the amazing tips <3 Take care*
Good tips! Your picture are beautiful!
Come by my blog soon<3
xx
I always admire your photos, and I am glad that you shared these tips! I just got a new camera, but I am still trying to learn the settings! I am looking forward for the next photo tips post. :D
Thanks a lot for your tips dear!!!
Keep in Touch Anni
http://www.fashionhamburg.com
These tips are actually super helpful! Thank you for sharing. Your pictures are gorgeous by the way.
the-creationofbeauty.blogspot.com
Thank you for the tips! Couldn't agree more with you. I always take a picture of the product's ingredients too instead of writing it all xD would be so boring and tiring. Not everyone would have an interest to read the ingredients anyway.
xx
http://felishmichelle.blogspot.com
Wow. That's a lot of great advice. Super helpful :)
gingercatqueen.blogspot.com
I've always loved you photos on the blog and I can tell you take pride in them.
http://www.vworldrocks.blogspot.com
Amazing tips! Will try doing these. :)
Such great tips! I'm just starting out and I'm so confused on how to make my blog personally mine! Thanks so much!
Great tips! No wonder why your pictures are all amazing.
We have the same cam :) I really love your photos, thanks for the tips sis! <3
http://www.beautychapter.net
This was really helpful as I'm trying to make my newer photos more 'artistic'. I just wish I did this waayyy back with my older photos.
Great tips doll and so true the pic are important but so is the layout and details of it at least to me.
http://tifi11.blogspot.com
rule of thirds! i keep forgetting that one and i honesty think the most important things are lighting and your lens, not necessarily the body of your camera. a dslr is really overkill if all you're doing is product and face shots. it is capable of so much more and you're paying a premium to use a 10th of its abilities.
Jenn
A Beautiful Zen
very frustrated before that i don't have a good camera but when i used my sister's dslr, my photos are “uncontrollable” and i cant tweak them. right now i'm just using my phone's camera under a nice natural lighting and bamboo chopping board hehehe and they look better than my former photos…lesson learned: take photos with a camera that you are comfortable with :)
as always, love your photos Shayne and photos really captures a reader's interest
Awesome tips!!!! These are very helpful especially to those who are just starting their way on blogging :D
Awesome tips Shayne! Your photos are always gorgeous! I agree, it's very important to get used to and learn how to use your cameras to utilize them best. It took me a while, but my point and shoot, and my phone work just fine!
I think I need extra photography lessons – I'm trying to up the quality of my photos for the blog right now. These tips are actually perfect! I really need to get to know my camera better and be better at working with angles! Thanks for all the help! :]
xo Deborah
Coffee, Prose, and Pretty Clothes
Great post! Very informative and helpful. For me, the photos are also the first things I notice when I visit a blog. Natawa ako sa tip mo na it would be great to have your own STUDIO haha. I wish I can have my own!! <3
http://itsthekyliebabii.blogspot.com/
Love these tips Shayne! Thanks for sharing them. I especially liked that photo of the earrings.
i definitely do not have my own photography style yet.. some days i take product shots on white background, and some days i do it with colored/textured background.. (i can relate with using jacket/clothes as background, i did that too!). i think it depends on my mood and availability of resources… but i should find my style, one that i can really claim as my own! :D btw, we are using the came nikon model, cool!!!
Wow! this is great Shayne! Don't have my own DSLR camera yet but I'm planning to have one. I used to study the basics of photography and what I learned are almost similar from what you said. I always love your photos too,like always. They always look pretty! I agree that one doesn't need a dslr camera but I guess it's a big bonus esp. when you're taking phtos at night (which will give a poor lighting)-my usual dilemma, being a night owl ahaha. Cheers for the tips Shayne! Love to read more :)))
love lots,
Tin
mypoeticisolation.blogspot.com
Thank you for sharing these tips, Shayne. I do not own a DSLR and so I have to rely a lot of editing. My Canon S95 which used to be a really great point and shoot which sometimes produces dslr quality images seems to be declining. It seems to be capturing images too dark and I've to brighten my pictures by many notches.
I used all sorts of things for background like the cover of a rattan box, my laces skirts, textured clothing but never have I thought that a chopping board would provide a beautiful wooden backdrop too! Seeing your pictures always make me wanna buy some fake pink roses. I really need those as props.
RYC:
Pon and Zi? I went to google them and I didn't know these comics strips that's often shared on FB and other social media platforms have got names! Thanx for introducing them! Yes, I would definitely keep you informed on the package. I would want it to reach you safe and sound! =)
Jo
Jo's Jumbled Jardinière
Awesome tips! I like seeing various items as “props” in the background of photos, though it's easy to overdo it. It's all about balance, I guess!
Awesome tips sis!! I'm so glad you did a post about photography coz I adore your blog photos so much! You're so creative when it comes to taking photos, your artistic side really shows =D And wow, I had no idea that was a wooden chopping board, you're so good at improvising! =D I'm still working on my photos, sometimes I find it hard coz I'm not 100% familiar with the camera I use. Just hows how important it is to know your camera inside and out. Thanks for all the tips sis, sooo useful! <3
Take care always, love Christine ~ xx
BLOG | BLOGLOVIN' | TWITTER | FACEBOOK
im glad you like the post! you can get get them at any supermarket :) you just need to be picky with the flowers and pick the ones that look less fake.
thanks fatima! :)
thanks kallie! :)
i noticed the plates and how your photos continuously improves in every post you make! <3 decor flowers are the best to use imho. they pretty-fy any photo instantly. I'm planning to get more colors too but its a bit hard to pick the really nice looking ones.
thanks!
thanks sis! hopefully soon mas complicated kase siya cause its technical but ill post one in the future for sure :)
thanks anni! :)
thank you shannon! <3
correct! :) i'd love to do it all the time but sometimes its just so hard to get the camera to focus on the letters lol
thanks giedre! :)
thank you vee! always nice to hear from you! <3
thanks glenn! :)
thank you kendal! :)
thanks julie! :)
GMTA hihi! thanks sis!
hehe thank you anna <3
thanks jackie! :)
couldnt agree more jenn! im thinking on investing on a macro lens and a studio light. there are a lot of shots that i want to try create but i cant cause of the lack in resources and skillz
ay my first expereince with a DSLR was the same sis! you're right kelangan talaga hiyang ka with a camera.
thank youu! :)
PS: hehe chopping boards are the best!
thanks jhanz! :)
thank you anna! <3
thanks deborah! there are helpful tutorials in youtube :) i think some are even specifically made for fashion bloggers. i think fashion shoots are alot more difficult than beauty tbh <3
you and me both! mahal mahal ng equipment grabe :( first thing i want to buy siguro would be a soft box, nice for fashion shoots too! :)
thanks sis! :)
ooo you, me, and steph! GMTA! haha :) its the same with me. some things i feel like looks best on a white surface but there are others that looks good on a more texture background. it depends talaga on the resources :)
hello fellow night owl! hehe (i have insomnia)
i can imagine na what you can do with a DSLR! i really hope you get one really soon.
itll showcase your creativity more talaga.
thank you sis! <3
haha i thought you'd like the pon and zi comics :)
i edit my pics the same way too since my room isn't bright enough. DSLR will also require a lot of lighting, thankfully we can edit our pics to make them look brighter and more accurate. imagine back in the days when these were not possible :D
flowers are best decor imho, hope you can get them for your pics & your room.
yes pls! may i ask when are you planning to send it? im excited to see them :)
thanks rebecca! so nice to hear from you again :)
thank you sis! i appreciate it! haha i thought it was a pretty neat trick too. the pic ended up looking like the bath creams were inside a wooden sauna :P what camera are you using? :)
This is such a thought out and useful post! No wonder all your pictures look amazing :) xx
Pillarbox Post
thanks rachel! :)
NOTED! I need your tips so baddd! heehee!
i've always loved your photos, shayne. super creative. <3
YES, THIS POST IS GREAT AND I WANT TO SEE THE EDITING POST TOO, BUT SRSLY, YOU DON'T GIVE YOURSELF ENOUGH CREDIT. YOUR PHOTOS ARE GORGEOUS TOO! Quinn's photos though, pretty much blows everyone out of the water jfc (-sobs-)
Your photos are really beautiful, Shayne. These photog tips are helpful, so I'm glad you hit “publish”! Especially the rule of thirds and your background tips…I'm looking forward to a post about editing!!
great tips, I always admire your photos. :)))
Thanks for sharing your photography tips! :) I absolutely love all your photos, and I wish I could take photos like you! Haha. I have trouble with getting enough natural light in the room, since I live in Seattle (it's cloudy a lot!) :(
I also loved how you mentioned using unexpected things like that wooden chopping board! Great tips.
You always have such lovely photos! I have to admit, I definitely use your pictures for inspiration lately. I've also been pushing myself to be more dynamic with backdrops and angles. Still have a long way to go but I think I'm getting better :)
wow! thanks for the tips sis! really, really helpful! :)
Really?? I never see them in the supermarkets >_<
They look like the perfect photography decorations ~~
xx
Thanks for the tips! You' re pictures look beautiful! x
nice for the room too! i would suggest a specific store but i think were from diff countries? :)
thanks sis! <3
hahaha her photos are too nice! i wish i could learn how improve mine, been reading and watching tutorials on ambient lights and lenses lately. i wish i could buy one soon but its so expenseee. btw do you use dlsr flash?
thank you! :)
thanks galaxia! :) btw did you make a new blog?
aw thanks giday <3 how are you?
hahaha thanks melissa :) i have the same problem in my room, although its not always cloudy here. its just really dark in my room haha.
aw thanks audrey! i appreciate it! im also on the process of doing the same. just yesterday i was researching on lighting. its frustrating to be honest hehe :)
ay you dont need these name! your photos are too nice already :) thanks sis!
So so helpful! You're a genius with cameras :)
Hope you'll have a look of my blog!
xo
http://follementefashion.blogspot.it
Such a helpful post, pictures are what really capture someone when they first check out a blog and yours are fantastic!
Erin and Katherine Talk Beauty
Thanks for the tips!! I really need to invest in a better camera and find better lighting. I always enjoy looking at your pictures. (:
thanks eleonora! :)
thanks erin and katherine!
aw thanks lupe, i appreciate it! 2 to 3 lamps will help with the lighting indoors :)
You always take beautiful blog photos Shayne. I for one already gave up on that. I've been trying to make my photos prettier but I can't seem to do so, I guess I just don't have the knack to use pretty things as my photo background hehehe
Random Beauty by Hollie
I've been learning from both you and vanessa when it comes to making my blog photos look pretty, however I'm not having any luck with it. LOL I will keep trying though, maybe sooner or later I'll get it. I'm just using my Nikon D5000 with kit lense. I'm still in the experimental stages of learning. hahaha
Your photos always look lovely, I don't seem to have an eye for pretty things, thus my photos are always a fail. LOL
BTW, sis I nominated you the Beauty Blogger of the month Award
http://redberryaha.blogspot.com/2014/08/beauty-blogger-of-month-award.html
aw thanks sis! vanessa's skills is pro level, thats why i get inspiration from her too. im actually thinking of getting a new lens cause im also using my kit lens. madami pala dito using nikon so nice to know! :)
will check it out now, thank you thank you!
Wow this is very helpful and your photos are always on point. I don't have a dslr yet. I just have my trusty digital camera but when I get to have one I might go back to this post :)
Your gorgeous and I love this blog!! Super professional .will be stopping by again
Martina xx
http://Www.martinasmark.blogspot.com
Loved the tips. Your vital tips are very useful for new bloggers. Thank you for sharing these dear :-)
Would love to see more of such blogging tips.
http://naturelbellefemme.blogspot.com
I honestly thought that your photos were taken through a dslr yette! Galing naman :)
Thanks martina!
Thanks belle! Will post more of these in the future, im glad you like it!
PHOTOSHOP, MY FRIENDS. PHOTOSHOP.
WOW!
this is VERY helpful.
:D
❤ Ms. Kei
Thank you for sharing all these wonderful tips with us!!!! I will give them a try :) I am still looking to invest in a better camera, what brand of camera do you recommend for beginners, any ideas? :)
http://beautyboxchic.blogspot.ca/
Thanks kei! :)
That helps too! Or other windows photo editing apps iin case you find photoshop too complicated :)
It's a great post ! Really helpful !
Hi Janet! :) the sony camera i mentioned is really nice. Sometimes its even better than my dslr and its lens kit. Plus its portable <3
Thanks Charlo! :)
I quite honestly read through every word of this and I've continued to save it to my favourites.. there are some very good tips in this post. Thank you! :)
http://findmethoseheels.blogspot.co.uk/
x
thanks gabrielle! <3
Thank you for the Tips !! I really enjoyed reading this blog post and I'll keep that in my mind Thanks for the tips Ate Shayne Love your Photography Skills !! :) well tbh I'm looking for your follow button but I can't seem to find it :(
Molly <3
http://www.corinnemolly.blogspot.com
thanks molly i appreciate it! <3 you can find it at the upper right corner and right below the end of this post.
If you remember I mentioned before that I love your photos here on your blog and even mentioned that you make an eyeliner photo look really gorgeous! So I'm happy you wrote this. I'm experimenting things myself these days and really hoping to get better through time. I attended a Photography class before and we've definitely talked about rule of thirds and all that and I'd seriously need to brush up! LOL
hehe thank you sis! was it a full photography class? from where? im thinking of attending a full class din but idk where to do it. and i dont want it sana to be too formal or expensive :P
I just read this post and I just want to thank you for these tips! I am quite familiar with the depth of field and rule of thirds but I don't claim to be good at it as well. Hahaha. I am already planning to buy a new camera and I'm torn between a Sony a5000 or a Canon or Nikon. Really not sure what to get yet but I would do my research. Or maybe you could recommend one for a beginner like me? :)
Aye i havent tried any sony or canon dslr so i cant compare but i can vouch for nikon :) I also had to choose between these brands before. Some friends told me that nikon is better and cheaper if i want to purchase separate camera lenses later on so i chose it. And if you're familiar with the blog Kayture, her photographer uses nikon cam & lenses. Hes one of my fave photographer, but there are a lot of good photographers who prefers canon too! :)
Btw thanks janine! im glad it helped! ^^
I love this, Miss Shayne!!! <3
thank you kaye! and so nice to hear from you naman! <3
WOW! Thank you for sharing this Shayne! Pictures really bring life to a blog and with this tips, it will help a lot of bloggers. Thank you again!
Btw, I followed you through Bloglovin'. Hope you can follow back too. ^_^
Looking forward your other posts!
xo,
Louise of The Legendary Ukayista
Thanks Louise! I appreciate it, sure! :)
Thanks Shayne :) It was helpful